
by Glorifix
Share
Share
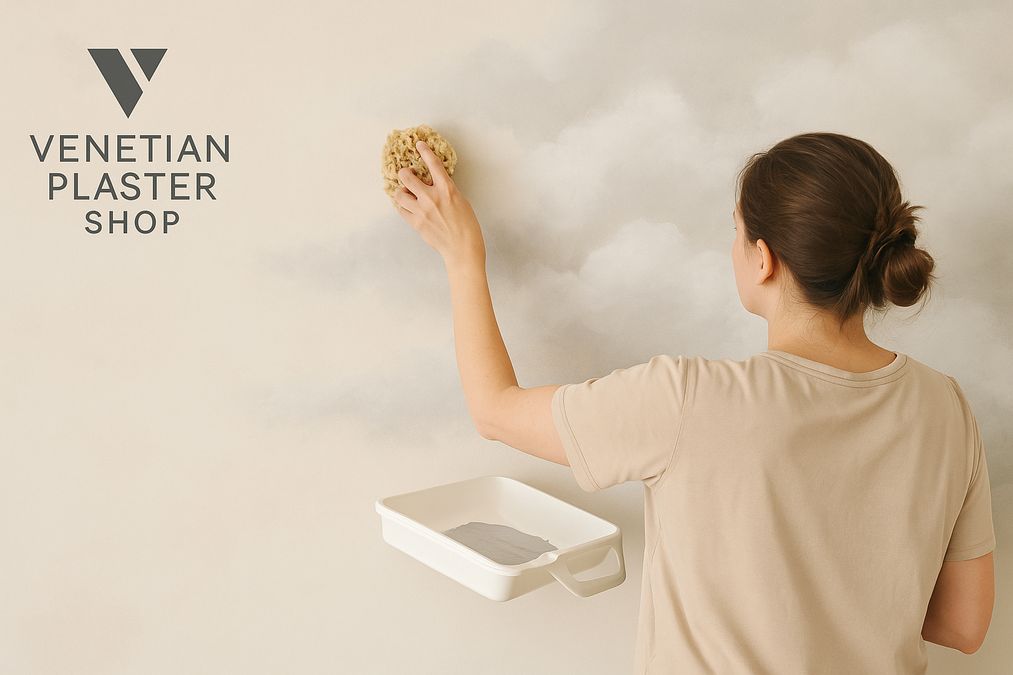
Why Choose a Cloud Mural Paint Finish?
Over the past few years, demand for artistic wall finishes has soared in Toronto. Many of our customers tell us they want walls that “feel like art” but don’t look manufactured. Compared to wallpaper or a single accent colour, a cloud mural adds movement, tranquility, and a subtle sense of depth that suits bedrooms, lobbies, commercial lounges, and spa-like bathrooms alike.
- Customizable: You control colours, size, and softness.
- High impact: Instantly becomes a visual focal point, even in minimalist spaces.
- On trend: Works for modern, traditional, and eclectic interiors alike.
- DIY-friendly: With clear steps, the right tools, and patience, anyone can achieve a sophisticated look.
Notably, creating this look yourself offers budget savings, plus the satisfaction of a personalized, hand-painted finish. As decorative paint specialists, we see many homeowners surprised at how accessible this style is compared to alternatives like artist-commissioned murals or custom wallpaper.
Planning Your Cloud Mural: What to Know Before You Start
One of the most common mistakes we see is underestimating the importance of planning. Before picking up a brush, consider:
1. Wall preparation:
- Don’t paint over failing surfaces; ensure old paint is stable, clean, and matte for the best bond. Unsure whether previous layers are safe to paint over? See our guide on painting over old paint in Toronto homes.
2. Room function and lighting:
- Soft cloud finishes look beautiful in naturally lit rooms but can also add brightness and dimension to spaces with limited sunlight. In north-facing rooms, opt for warmer base colours; in sunny spaces, cooler and lighter hues work well.
3. Colour selection:
- Whites, blues, greys, even pastels and metallic sheens: all can work, depending on the mood you want to evoke. Sample small patches first to see how colours shift in different lighting conditions.
4. Choosing the right finish:
- Matte or eggshell finishes typically create the softest, most realistic cloud effects.
- For extra texture or a more dramatic effect, consider Venetian plaster or decorative paints for background layers—explore options at venetianplastershop.ca’s Decorative Paints.
Essential Materials & Tools
Gather these supplies before beginning. We recommend purchasing from venetianplastershop.ca, as they carry professional-grade Giorgio Graesan Italy products suitable for the Canadian climate and design sensibilities:
- High-quality acrylic or latex paints in chosen sky and cloud hues
- Soft artist’s brushes (various sizes)
- Large synthetic sponges and sea sponges
- Clean rags or microfiber cloths
- Painters tape, drop cloths, step ladder
- Mixing tray or palette for blending
- Warm water spray bottle (to soften edges and blend)
- Optional: Venetian plaster or specialty paint for added depth
- Protective gloves and mask (especially in older homes with old paint)
In our experience, investing in a high-quality base paint and genuine natural sponges yields the best cloud effects. Cheaper synthetic tools can create streaks or repeat patterns rather than soft gradients.
Step-By-Step Guide to Create Cloud Mural Paint Finish Without Professional Help
Step 1: Prepare Your Surface
- Remove furniture or cover it securely. Lay down drop cloths to protect flooring.
- Clean the wall: Ensure surfaces are dust-free, oil-free, and dry.
- Repair imperfections with filler, sand, and allow to fully dry.
- Apply a coat of primer or a fresh base paint in your chosen sky colour. Allow to cure thoroughly.
Step 2: Map Out Your Cloud Areas
- Use painter’s tape to mask off areas that shouldn’t be painted (baseboards, ceilings, outlets).
- With a pencil, lightly sketch where you want major cloud clusters—high, low, or concentrated on one side for an asymmetrical look.
Step 3: Mix Your Cloud Colours
- Pour a small amount of your base “cloud” colour (usually off-white or pale grey) into a tray.
- Add a touch of sky colour for shadows, or metallic pigments for sophisticated depth (available at venetianplastershop.ca).
- Use separate trays for lighter and darker mixes; you’ll blend them as you work.
Step 4: Apply the Clouds
- Sponge Base: Lightly dampen your sponge. Dab into the lightest mix and gently pounce onto the wall following your sketched areas. Rotate the sponge to avoid pattern repetition. Step back often to assess shape.
- Brush in Details: With a soft brush, feather out some cloud edges to create wispy, natural forms. Use a spray bottle to mist water onto hard edges, then gently blend with a cloth or dry brush.
- Add Depth: Introduce mid-tones or subtle shadow hues by repeating the process, working from the inside out. In high-end projects, many professionals use up to 3–4 cloud tones for realism.
- Luminosity: For “sunlit” effects or metallic highlights, very lightly dry brush small sections with a pearlescent paint or metallic glaze, available at venetianplastershop.ca.
Work in sections, always stepping back to assess the overall composition. Clouds appear most realistic when shapes are irregular and overlapping, with soft, semi-transparent edges.
Step 5: Finishing Touches and Protection
- Once satisfied, allow the mural to dry fully.
- If the wall will see wear (e.g., in a commercial space or children’s room), topcoat with a matte, wipeable sealer compatible with your paint.
- Carefully remove painter’s tape and clean up edges with a small brush if necessary.
Professional Tips Gathered from the Field
- Many customers are surprised to learn that overworking the paint is the most common mistake. Less is often more.
- Test your technique on a large cardboard panel before starting on the wall.
- If you’re not loving your work-in-progress, let each layer dry before adding more paint on top—clouds can be built up gradually.
- Cloud murals look particularly striking on curved walls or ceilings; just be aware this requires longer ladders and more careful planning.
- For added luxury in commercial or hospitality spaces, combine cloud painting with Venetian plaster accents or blend clouds upward from a feature wainscot in a contrasting finish.
Choosing the Right Paint: Decorative Paints vs. Standard Paint
While basic latex wall paints can work, experienced professionals often recommend premium decorative paints for deeper, richer effects and better blending:
| Feature | Decorative Paints (e.g. Giorgio Graesan) | Standard Wall Paint |
|---|---|---|
| Blendability | Excellent, slow-drying for better cloud effects | Average, may dry too fast for smooth gradients |
| Colour Depth | Layered, nuanced, luminous | Flat single-tone |
| Durability | High, especially with protective topcoat | Moderate |
| Special Effects | Pearlescent, metallic, texture options | Limited |
| Compatible with Venetian Plaster | Yes | No |
| Availability in Toronto | Available via venetianplastershop.ca | Most paint retailers |
For best results—particularly for large feature walls, bathrooms, or offices—speak to a specialist at venetianplastershop.ca for advice on paint and finish compatibility. They often recommend Giorgio Graesan products for their blendability and depth, which are ideal for mural effects.
Maintenance & Durability: Cloud Murals vs. Alternatives
One question we often get is, “How does a cloud mural last compared to wallpaper or other decorative finishes?” Here’s what we tell clients:
- Cloud mural (decorative paint): With the right products and a protective topcoat, expect 5–10 years of beauty, even in busy spaces. Touch-ups are easy and blend seamlessly if scuffed.
- Venetian plaster cloud effects: Superior durability, moisture resistance, and elegance—especially recommended for commercial lobbies, bathrooms, or spaces seeking a tactile, stone-like luxury. See full selection at venetianplastershop.ca.
- Cloud-inspired wallpaper: Fastest to install, but harder to customize and repair. Ideal for rentals or when you want a bold effect without painting.
For many residential projects, a painted cloud mural strikes the best balance between creativity, longevity, and cost—especially helpful for Toronto’s dry winter heating and humid summer cycles, where some wallpapers can peel.
Room-by-Room Design Guidance
Bedrooms & Nurseries
Opt for soothing blue, cream, or blush clouds. Consider a gradient or “sky ceiling” effect for immersive calm. Many homebuyers in Toronto’s family-friendly neighbourhoods request this finish for nurseries and children’s rooms.
Living Rooms & Condos
A subtle, misty grey or metallic cloud accent wall can add spaciousness in smaller condo living areas. Place clouds opposite a major window to maximize the light-enhancing illusion.
Offices & Commercial Spaces
Cloud murals are practical yet elegant for therapy clinics, yoga studios, spas, and boutiques looking to evoke calm and creativity. Bolder hues—gold, bronze, even deep blues—fit hospitality or retail environments aiming for drama.
Bathrooms & Wellness Areas
For humid spaces, we often recommend a cloud mural executed in Venetian plaster for moisture resistance and tactile appeal. Alternatively, ensure your selected paint is rated for bathrooms.
Combining Cloud Murals with Other Wall Finishes
For a one-of-a-kind Toronto interior, consider accenting your cloud mural with:
- Venetian plaster base or trim: For an old-world-meets-modern effect.
- Feature Wallpapers: Combine cloud murals with a statement wallpaper on adjacent walls—discover wallpapers curated for co-ordination.
- Textured or metallic details: Subtle metallic veining can create a “sunlight through clouds” illusion.
When helping homeowners choose, we frequently advise combining a painted mural with durable Venetian plaster in high-traffic or moisture-prone areas, keeping the mural on a focal wall where it’s most protected.
FAQ: Toronto Cloud Murals in 2026
How long does it take to complete a cloud mural?
Most single walls can be completed in a weekend, including drying time. Larger or more intricate designs may require a few extra days.
Can I achieve a “microcement look” with cloud murals?
For those interested in soft, cloudy effects with the stone-like durability of microcement, see our post on paints that mimic microcement finishes.
Where else can I learn practical DIY techniques?
If you prefer video walkthroughs or want more inspiration, explore our full primer: DIY techniques for achieving cloud-like paint finish at home.
Should I seal my mural? What sealer works best?
In high-traffic spaces, a matte-finish, high-quality acrylic topcoat is recommended for easy cleaning and longevity. Ask venetianplastershop.ca for product recommendations compatible with your paint choice.
Is this too hard for a first DIY project?
Not at all! Most beginners achieve great results with patience, the right tools, and by following a proven process like the one above.
Ready to Start Your Toronto Cloud Mural Project?
If you’d like hands-on guidance, a full product consultation (including Giorgio Graesan paints and authentic Venetian plasters), or to sign up for workshops on decorative wall techniques, visit venetianplastershop.ca/contact-us or call our Toronto team today.
Interested in learning step-by-step from experts? Sign up for one of our Venetian Plastering Basic Workshops—perfect for both beginners and seasoned DIYers.
Explore decorative paint options, sample boards, and colour consultations in person at venetianplastershop.ca, your source for premium wall finishes in Toronto and the GTA.
STAY IN THE LOOP
Subscribe to our free newsletter.
Choosing the right wall finish for your Toronto home, business, or design project is not simply a matter of style—it’s a decision that impacts durability, maintenance, cost, and even the value of your property. One recurring question we hear from homeowners, designers, and contractors is: when can decorative paint stand in for traditional plaster walls, […]
Looking for an affordable way to create the luxurious look of plastered walls—without the cost or hassle of traditional plasterwork? Whether you’re a homeowner, an interior designer, or a contractor in Toronto, mastering affordable decorative paint techniques to mimic plaster finish can transform residential or commercial spaces dramatically. Our expert team at venetianplastershop.ca shares must-know […]
Decorative wall finishes can transform an ordinary space into one that feels custom-designed and inviting. However, many Toronto homeowners, designers, and contractors often face two big concerns: achieving the high-end look of plaster finishes—such as Venetian plaster, limewash, or textured surfaces—on a reasonable budget, and understanding which affordable decorative paint techniques offer the best blend […]
Introduction: Understanding Your Decorative Finish Options in 2026 If you’re planning to give your Toronto home, retail store, or office a fresh new look in 2026, you’ve likely considered decorative finishes. But one of the biggest decisions you’ll face is whether to use a DIY paint kit or invest in professional decorative finishes like Venetian […]